
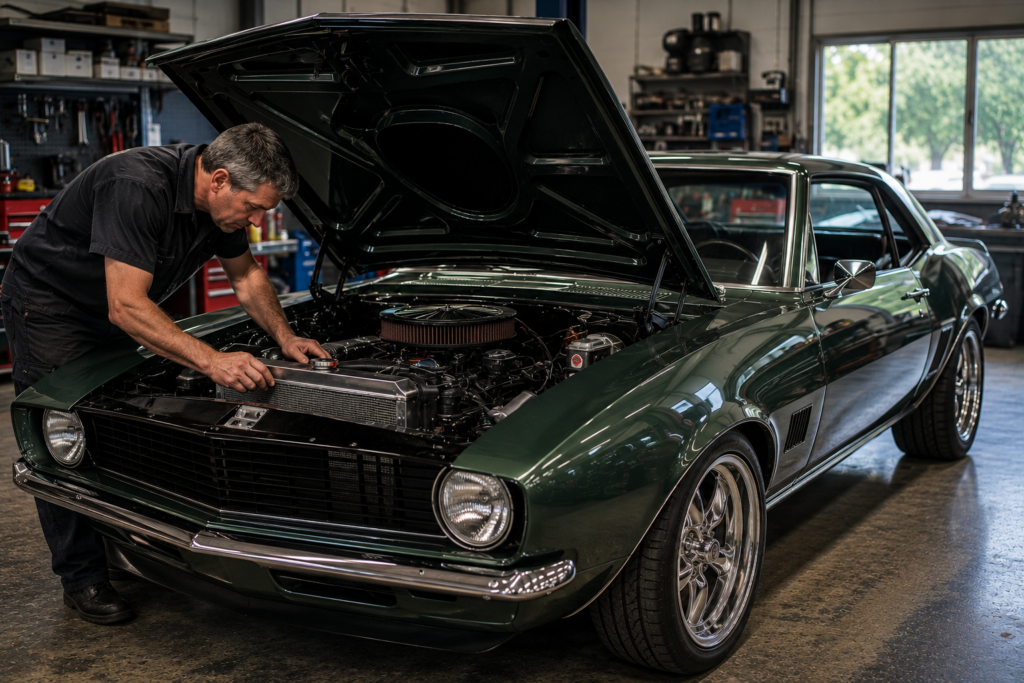
Few sights make a classic car owner more uncomfortable than watching the temperature gauge climb toward the hot end of the scale. Older vehicles can be especially sensitive to cooling-system problems because decades of corrosion, aging hoses, partially blocked radiators, weak water pumps, incorrect thermostats, and worn fan components can all reduce the system’s ability to control engine temperature.
A properly functioning classic car cooling system should keep the engine within its intended operating range whether the vehicle is cruising down an open highway or sitting in slow traffic. Preventing overheating starts with understanding how the system works, inspecting each component carefully, and correcting small problems before they become roadside breakdowns.
If your vehicle has recently undergone major work, cooling-system inspection should be part of the larger restoration plan. Reviewing what goes into a full classic car restoration can help you see how the engine, radiator, electrical system, hoses, and other components fit into the overall project.
Understand How a Classic Car Cooling System Works
 Most liquid-cooled classic cars rely on several basic components working together. Coolant circulates through passages inside the engine, absorbs heat, and travels to the radiator. Air moving through the radiator removes heat before the coolant returns to the engine.
The water pump keeps coolant moving. The thermostat regulates when coolant is directed through the radiator. The cooling fan helps move air through the radiator when natural airflow is limited, especially at low speeds or while the vehicle is stationary. Hoses connect the major components, while the radiator cap helps maintain the intended system pressure on pressurized systems.
Hagerty’s guide to maintaining an older vehicle’s cooling system explains that cooling-system design varies among different eras of cars, making it important to understand the specific arrangement used by your vehicle.
Do Not Treat Every Classic Car the Same
A 1930s vehicle may use a very different cooling arrangement from a 1960s muscle car. Likewise, a restored engine with higher compression or additional performance modifications may produce different cooling demands than an original engine.
Always begin with the specifications for the particular engine and vehicle. A component that works well on one classic may not be appropriate for another.
Inspect the Radiator Carefully
The radiator is one of the most important parts of the cooling system. Its job is to transfer heat from the coolant to the surrounding air. Unfortunately, age can reduce radiator performance even when the exterior still looks acceptable.
Inspect the radiator fins for damage, dirt, insects, or debris that can block airflow. Bent fins can reduce the effective cooling area. Also examine the tanks, seams, drain fittings, and hose connections for signs of leakage.
Inside the radiator, corrosion and mineral deposits can restrict coolant flow. A radiator that appears clean from the outside may still have partially blocked internal passages. If an older vehicle consistently runs hot despite otherwise healthy components, radiator condition deserves careful evaluation.
Consider Restoration Before Replacement
Owners concerned with originality may be able to have an original radiator professionally cleaned, repaired, or recored rather than immediately replacing it. This can preserve a period-correct appearance while improving cooling performance.
For modified vehicles, an upgraded radiator may be appropriate, but bigger is not automatically better. Proper airflow, fan placement, coolant circulation, pressure rating, and overall system design all matter.
Check the Thermostat
The thermostat plays a simple but essential role. It remains closed while the engine warms up and opens at a specified temperature to allow coolant to circulate through the radiator.
A thermostat that fails closed can restrict coolant flow and cause rapid overheating. A thermostat that remains open can prevent the engine from reaching its intended operating temperature efficiently.
Use the temperature specification recommended for the engine rather than assuming that installing the coolest available thermostat will solve an overheating problem. The thermostat is part of a balanced system, and changing it without diagnosing the actual cause may simply hide another issue.
Watch for Temperature Patterns
The way a car overheats can provide clues. If the temperature rises rapidly soon after startup, coolant circulation or thermostat operation may deserve investigation. If overheating happens mainly while idling but improves once the vehicle starts moving, airflow through the radiator may be insufficient.
If the vehicle overheats primarily at highway speed, the problem may involve coolant flow, radiator capacity, thermostat operation, combustion gases entering the cooling system, or another mechanical issue rather than simply the cooling fan.
Inspect Every Cooling Hose
Radiator and heater hoses deteriorate with age, heat, coolant exposure, and repeated pressure cycles. An old hose may look acceptable from a distance while being soft, swollen, cracked, or weakened near a clamp.
Inspect both upper and lower radiator hoses, heater hoses, bypass hoses, and any smaller cooling-system connections. Look for cracking, bulges, abrasions, wet areas, or dried coolant residue.
Pay particular attention to hose ends beneath clamps. Small leaks frequently begin in these areas.
Signs a Cooling Hose May Need Attention
- Visible cracking or splitting
- Soft or unusually spongy sections
- Bulging near fittings
- Coolant stains around clamps
- Hardened or brittle rubber
- Hoses rubbing against nearby components
Keeping hose inspections within your normal service routine is important. Your existing guide on creating a preventive maintenance schedule for a classic car can help you organize these checks alongside oil, brakes, tires, battery condition, and other routine items.
Check the Water Pump, Fan, and Belts
The water pump keeps coolant circulating through the engine and radiator. A worn pump can leak, develop bearing play, become noisy, or lose pumping efficiency.
Inspect around the pump for signs of coolant leakage. Listen for unusual bearing noise and examine the pulley for excessive movement. Because many classic cars use belt-driven pumps, belt condition and tension are equally important.
A loose or slipping belt may reduce water-pump speed and fan performance. Inspect the belt for glazing, cracking, fraying, missing material, or contamination.
Mechanical Fans Need Inspection Too
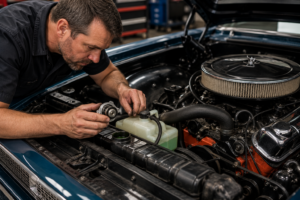 Classic cars often rely on mechanical fans driven by the engine. Check the blades for damage, cracking, incorrect orientation, or evidence that the fan has contacted the radiator or shroud.
If the vehicle uses a fan clutch, make sure it is operating as intended. If an electric fan has been added, verify that it switches on at the correct temperature and that wiring, relays, fuses, and grounds are properly installed.
A properly designed fan shroud can also make a major difference at low road speeds because it helps direct airflow through the radiator rather than allowing the fan to draw air from around it.
Choose the Correct Coolant
Coolant does more than prevent freezing. It also raises the boiling point of the cooling mixture and contains additives designed to help protect cooling-system components against corrosion.
Different engines and cooling-system materials may require different coolant formulations. Do not assume that every antifreeze product is interchangeable. Mixing incompatible coolant types can create problems, so identify what the vehicle currently contains before adding another product.
AAA explains in its guide to selecting engine coolant that using the correct coolant is important for temperature control and protection against corrosion.
Never Open a Hot Cooling System
A hot, pressurized cooling system can cause serious burns. Never remove a radiator cap simply because the temperature gauge is reading high. Allow the engine to cool completely before inspecting coolant levels or opening the system.
If the vehicle begins overheating while driving, find a safe place to stop rather than continuing until the engine becomes severely overheated. AAA advises that an overheating engine should not be ignored because continued operation can lead to significant damage. Its engine overheating guide discusses common causes and warning signs.
Inspect the Radiator Cap
The radiator cap may look insignificant, but on a pressurized cooling system it helps maintain the designed operating pressure. Increased system pressure raises the boiling point of the coolant.
A damaged seal, weak spring, incorrect pressure rating, or corroded cap can contribute to coolant loss or improper system operation. Always use a cap with the correct specification for the vehicle rather than selecting one simply because it physically fits.
Look for Coolant Leaks
Small leaks can eventually lead to low coolant and overheating. Inspect the garage floor after the vehicle has been parked and examine the engine compartment regularly.
Leaks may occur at the radiator, water pump, heater core, intake manifold, thermostat housing, freeze plugs, hoses, fittings, or gaskets. Dried coolant can leave visible deposits even after the liquid itself has evaporated.
If coolant continually disappears but no external leak is visible, further diagnosis may be necessary. Internal leaks can be more serious and should not be ignored.
Do Not Ignore the Heater Core
The heater core is essentially a small radiator inside the passenger compartment. Coolant circulates through it so that cabin air can be warmed.
A failing heater core may produce a sweet coolant odor inside the cabin, wet carpeting, fogging on the windshield, or gradual coolant loss. Heater hoses and control valves also deserve inspection.
Interior restoration work provides a good opportunity to examine hidden heater components. If you are already planning cabin work, see the guide to restoring classic car interiors before reinstalling carpets, dashboards, and trim around aging heater components.
Improve Airflow Before Installing Bigger Components
When a classic overheats, owners sometimes immediately purchase a larger radiator or electric fan. Before doing so, make sure the existing system can actually receive enough airflow.
Check whether the radiator fins are blocked, whether the fan is correctly positioned, and whether a missing shroud is allowing air to bypass the radiator. Also inspect aftermarket accessories mounted in front of the radiator. Air-conditioning condensers, transmission coolers, and other equipment can affect airflow if poorly positioned.
Overheating at Idle Versus Highway Speed
If the car runs cool on the highway but heats up while sitting in traffic, inadequate low-speed airflow is a strong clue. Fan operation, shroud design, fan spacing, and idle speed should be evaluated.
If the opposite occurs and the engine becomes hotter at sustained road speed, the diagnosis should extend beyond the fan. Radiator restriction, coolant-flow problems, ignition timing, engine condition, or other issues may be involved.
Check Ignition Timing and Engine Tune
Not every overheating problem begins in the cooling system itself. An engine that is poorly tuned may generate more heat than expected.
Incorrect ignition timing, improper air-fuel mixture, vacuum problems, and other tuning issues can affect operating temperature. Before repeatedly modifying the radiator or fan system, make sure the engine is mechanically healthy and properly tuned.
This is particularly important after a restoration in which the engine, carburetor, distributor, exhaust, or fuel system has been changed.
Keep the Engine Bay Clean Enough to Inspect
A spotless show-quality engine compartment is not necessary for reliable cooling, but keeping the area reasonably clean makes leaks and problems easier to identify.
Oil residue, dirt, and old coolant deposits can conceal the source of leaks. During regular maintenance, inspect clamps, fittings, hoses, belts, wiring, and fluid levels carefully.
If you perform much of your maintenance yourself, having the proper equipment makes inspection easier. Review the top 10 must-have tools for restoring vintage cars for useful equipment that can also support routine maintenance work.
Be Careful When Upgrading the Cooling System
Modern cooling components can be useful when properly selected, especially on classics with modified engines, air conditioning, increased power, or frequent stop-and-go driving. However, upgrading one component without considering the rest of the system can create new problems.
An electric fan requires adequate wiring and charging capacity. A high-flow water pump should be compatible with the rest of the system. A larger radiator must fit correctly and receive sufficient airflow. An incorrect pressure cap can overstress components designed for lower pressure.
The best cooling-system upgrades work together as a complete package rather than as unrelated parts.
Preserve Original Parts When Appropriate
For historically significant or highly original cars, consider whether existing components can be professionally restored before replacing them. Original radiators, fan shrouds, brackets, pulleys, and other pieces may contribute to authenticity and collector appeal.
If an original component is removed, label it and store it properly. Finding an authentic replacement years later may be difficult. Your guide to sourcing rare vintage parts in the digital age explains why planning ahead can be valuable for long-term restoration projects.
Test the Car After Cooling-System Work
After repairs or upgrades, test the vehicle under several operating conditions rather than assuming the problem is solved because it idles correctly in the garage.
Watch temperature during idle, moderate road speeds, extended cruising, and normal stop-and-go traffic. Look for leaks afterward and recheck the coolant level only after the engine has cooled.
Pay attention to whether the temperature remains stable rather than focusing only on one exact gauge position. Older gauges are not always highly precise, so if accuracy is uncertain, a technician may use separate measuring equipment during diagnosis.
Make Cooling-System Inspection Part of Routine Maintenance
The easiest overheating problem to manage is the one detected before the temperature gauge reaches the danger zone. Include radiator condition, coolant level, hose condition, belt tension, fan operation, and signs of leakage in regular maintenance inspections.
Your broader guide to maintaining a classic car after restoration can help you coordinate cooling-system care with engine maintenance, storage, detailing, tire inspection, and corrosion prevention.
Conclusion
Preventing overheating in a classic car is usually less about installing one oversized component and more about keeping the entire cooling system healthy. The radiator, thermostat, water pump, hoses, belts, fan, coolant, radiator cap, and engine tune all contribute to controlling temperature.
Begin with careful inspection and diagnosis. Replace deteriorated parts, correct leaks, maintain proper airflow, use the appropriate coolant, and make sure the engine itself is properly tuned. When upgrades are necessary, choose components that work together and suit the vehicle’s intended use.
A dependable cooling system allows a classic car to do what it was restored to do: spend more time on the road and less time parked with the hood open. Consistent inspections and thoughtful repairs can help protect both the engine and the restoration work invested in the vehicle for years to come.