
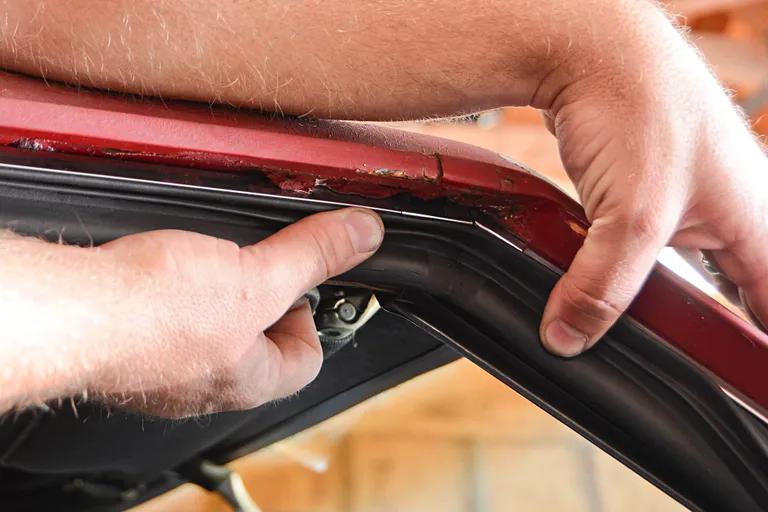
A beautifully restored classic car can still develop frustrating problems when its rubber seals begin to deteriorate. Water dripping onto carpets, wind noise around the windows, damp trunk carpeting, and doors that rattle while driving are common signs that weatherstripping needs attention.
Replacing old rubber seals is an important part of preserving a vintage vehicle. A proper classic car weatherstripping replacement can help prevent water intrusion, reduce road noise, protect interior materials, and limit the conditions that contribute to hidden corrosion.
Unlike modern vehicles, many classic cars use rubber profiles, retaining clips, adhesive channels, and window gasket designs that are specific to their production era. Choosing the correct replacement parts and installing them carefully is essential for a lasting result.
Whether you are completing a full restoration or improving an otherwise finished vehicle, this guide explains how to identify failing seals, select replacement materials, prepare the mounting surfaces, and check the installation for leaks.
Why Weatherstripping Matters in Classic Car Restoration
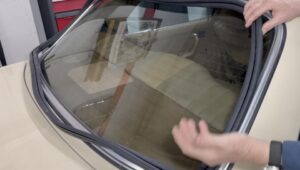 Weatherstripping creates a barrier between the vehicle’s interior and the outside environment. Rubber seals are installed around doors, windows, trunks, convertible tops, and other openings where water, dust, and moving air could enter.
Over time, exposure to sunlight, heat, moisture, cleaning chemicals, and repeated compression can cause these materials to lose flexibility. Rubber may become brittle, shrink, crack, flatten, or separate from its mounting surface.
Once a seal fails, moisture can collect beneath carpeting, behind interior panels, and inside body cavities. These areas are difficult to inspect and may remain damp long after the exterior appears dry.
During a full classic car restoration, weatherstripping should be considered alongside body repairs, paint preparation, interior installation, and final assembly.
Recognize the Signs of Failing Weatherstripping
Not every weatherstripping problem produces an obvious leak. Some failures appear gradually as additional road noise, unusual drafts, or difficulty closing a door.
Common Warning Signs
- Water entering the cabin during rain or washing.
- Damp carpets or moisture beneath floor mats.
- Wind noise around doors and side windows.
- Cracked, flattened, or hardened rubber seals.
- Loose weatherstripping around door openings.
- Water stains inside the trunk.
- Visible gaps between rubber and body panels.
- Rattling glass or excessive window movement.
These symptoms can also result from incorrect panel alignment, blocked drainage passages, or damaged window mechanisms. Identifying the actual entry point before replacing parts helps prevent unnecessary work.
The Steele Rubber Products weatherstripping guide explains the different types of automotive sealing materials and how their designs serve different purposes.
Identify the Different Types of Classic Car Seals
Classic vehicles use several distinct types of weatherstripping. Understanding their functions helps you order the correct replacement components.
Door Weatherstripping
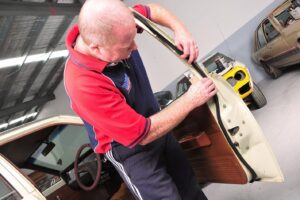
Door seals typically follow the perimeter of the door or body opening. Depending on the model, they may attach with adhesive, retaining clips, molded fasteners, or a push-on channel.
Window Channels and Beltline Seals
Window channels guide the glass as it moves. Beltline weatherstripping, sometimes called window sweeps, helps limit water and debris entering the door cavity where the glass meets the body.
Windshield and Rear Window Gaskets
Many older vehicles use rubber-mounted glass rather than the bonded windshield systems common in newer cars. These gaskets require the correct profile and installation method.
Trunk and Hood Seals
Trunk weatherstripping helps protect luggage compartments from water intrusion. Hood-to-cowl seals may help manage airflow and prevent unwanted moisture or debris from entering certain areas.
Each component should be matched to the vehicle’s exact year, make, model, body style, and applicable production variations.
Choose the Correct Replacement Weatherstripping
One of the biggest restoration mistakes is purchasing rubber seals based only on their approximate shape. Two seals may look similar while having different compression characteristics, mounting profiles, or molded corners.
Whenever possible, select parts specifically manufactured for the vehicle. Compare replacement components with the originals before removing the existing seals.
Consider Material Quality and Fit
Replacement weatherstripping may use different rubber compounds and manufacturing methods. The correct material should provide appropriate flexibility, resistance to environmental exposure, and compression for the intended application.
For vehicles requiring rare or discontinued components, sourcing suitable parts may take additional research. Our guide to sourcing rare vintage parts offers strategies for locating hard-to-find restoration components.
Manufacturers such as Steele Rubber Products provide model-specific installation instructions that can help restorers identify the appropriate installation method.
Gather the Tools and Materials
Weatherstripping replacement usually requires fewer specialized tools than major engine or bodywork repairs. However, using the correct tools helps protect paint, chrome, glass, and interior trim.
 Recommended Supplies
- Vehicle-specific replacement weatherstripping.
- Plastic trim removal tools.
- Suitable weatherstrip adhesive, when required.
- Adhesive remover compatible with the painted surface.
- Clean microfiber cloths.
- Masking tape for temporary positioning.
- Small brushes for cleaning mounting channels.
- Sharp cutting tools where trimming is permitted.
- Protective gloves and eye protection.
- Vehicle service manual or installation instructions.
Additional equipment may be necessary for complicated window assemblies. See our article on essential restoration tools for broader workshop preparation.
Remove Old Weatherstripping Carefully
Before removing anything, photograph the existing installation. Record where the seal begins, how its corners are positioned, and whether clips, screws, or molded ends secure it.
Some weatherstrips pull away easily, while others remain firmly attached with old adhesive. Avoid using metal scrapers directly against finished paint because they can scratch or chip the surface.
Work slowly with plastic tools and a compatible adhesive remover. Remove any retaining hardware carefully and keep reusable clips or screws organized.
Inspect the Exposed Metal
Once the rubber has been removed, inspect the mounting channel for rust, cracked paint, corrosion beneath old adhesive, and damaged retaining points.
Do not install new weatherstripping over active corrosion. Repair affected metal and restore the protective finish before continuing.
Also examine the door’s alignment. A misaligned door can create uneven pressure against the seal, leading to leaks or premature wear even when the rubber is new.
Clean and Prepare the Mounting Surface
Proper surface preparation is essential for adhesive-mounted weatherstripping. Old glue, grease, wax, dirt, and loose paint can interfere with bonding.
Use cleaning products suitable for the existing finish and follow the adhesive manufacturer’s preparation instructions. Allow the surface to dry completely before applying new material.
According to Steele Rubber Products’ weatherstrip adhesive instructions, removing old adhesive and contamination is an important part of achieving a reliable bond.
Dry-Fit Before Applying Adhesive
Position the new weatherstrip without glue to confirm that its profile, length, and molded corners match the opening.
Temporary masking tape can help hold the rubber in place while checking alignment. This trial installation also reveals whether the part is incorrectly sized or positioned.
Do not stretch the weatherstripping excessively to make it fit. Stretching can cause the material to retract later, creating gaps at joints and corners.
Install New Door Weatherstripping
Door seals must compress evenly when the door closes. Begin by identifying the correct starting position using the vehicle’s installation instructions.
For adhesive-mounted seals, apply the recommended adhesive in controlled sections. Follow the manufacturer’s directions for surface preparation, application thickness, tack time, and curing.
Some designs use molded ends that must be positioned first. Others require installation beginning at a specified corner or drainage location.
Steele Rubber Products recommends test-fitting seals before attaching them in its automotive weatherstripping installation tips.
Check Door Closing Pressure
New rubber can require more compression than old, flattened weatherstripping. A slightly firmer closing feel may be normal initially.
However, excessive resistance can indicate an incorrect seal profile, poor installation, or a door alignment problem.
Never force a door closed if the rubber appears trapped or improperly positioned. Doing so can damage hinges, latches, trim, or the new weatherstrip.
Inspect Windshield and Rear Window Seals
Windshield and rear window leaks deserve special attention because moisture can collect beneath dashboard components, behind trim, and inside window channels.
On vehicles using rubber-mounted glass, the gasket often plays an important role in positioning and sealing the window.
Inspect the surrounding rubber for shrinkage, cracks, gaps, hardened corners, and separation from the glass or body.
Know When Professional Glass Installation Is Necessary
Removing and reinstalling automotive glass can involve substantial breakage and injury risks. Some classic vehicles use specialized locking strips, rope-in installation methods, and delicate decorative moldings.
Incorrect installation may also compromise glass retention and water resistance.
Steele Rubber Products maintains a library of windshield and rear window gasket instructions covering several installation designs.
When the glass is expensive, rare, or difficult to remove, professional installation is often the safer approach.
Replace Window Channels and Vent Window Seals
Many classic cars feature vent windows, framed door glass, or distinctive quarter-window arrangements. These components often contain several different seals that must work together.
Worn window channels may allow glass to rattle, while damaged beltline seals can permit additional water and debris to enter the door cavity.
Vent window seals can be particularly challenging because they may fit around curved frames, pivot points, and small metal retainers.
The Metro Moulded Parts vent window installation guide outlines the specialized preparation and fitting considerations involved.
Keep Door Drainage Passages Open
Weatherstripping does not necessarily prevent every drop of water from entering a door assembly. Many vehicles are designed to direct incidental water through internal drainage passages.
Blocked drains can allow moisture to accumulate and promote corrosion. Inspect these openings while replacing window seals and clear debris without damaging the surrounding metal.
Replace Trunk and Hood Seals
A leaking trunk can cause hidden damage to carpeting, spare tire wells, wiring, and rear body panels. Replacing worn trunk weatherstripping is often an effective way to reduce water intrusion.
Remove the old seal, clean the mounting channel, and repair any exposed corrosion. Before applying adhesive, position the new gasket to verify its orientation.
Pay attention to the seam location, molded corners, and the direction of the seal’s profile. An incorrectly oriented trunk gasket can direct water inward instead of helping keep it out.
Steele Rubber Products explains the process in its classic car trunk weatherstrip installation guide.
Hood seals should also be inspected where originally equipped. Replace missing or deteriorated components with correctly shaped parts rather than generic rubber that may interfere with hood alignment.
Test the New Seals for Water Leaks
After installation and the required adhesive curing period, check the seals carefully. Close the doors, windows, and trunk, then inspect whether the rubber contacts the surrounding surfaces evenly.
A controlled water test can help identify remaining leaks. Use a gentle stream of water rather than a high-pressure washer, which can force water past otherwise functional seals.
Perform a Controlled Leak Test
- Place clean, dry towels near suspected leak areas.
- Have another person observe the interior.
- Apply water gradually to one area at a time.
- Watch for moisture entering around seams or corners.
- Record the location of any leaks.
- Allow the vehicle to dry before further adjustments.
If water continues entering the vehicle, inspect body seams, drainage channels, window alignment, and nearby trim attachments before assuming the new weatherstripping is defective.
Avoid Common Weatherstripping Mistakes
Even high-quality replacement seals can perform poorly when installed incorrectly. Common mistakes include applying adhesive over dirt, stretching rubber during installation, trimming too much material, and overlooking body alignment.
Using generic seals where molded vehicle-specific components are required can also create gaps or excessive compression.
Another mistake is closing doors or trunks before the adhesive has reached the curing stage specified by its manufacturer.
Do Not Ignore Hidden Rust
Replacing the seal without correcting corrosion beneath it may temporarily improve the appearance while allowing the underlying damage to continue.
If moisture has reached carpeting or interior panels, inspect those materials before reinstalling them. Our guide to restoring classic car interiors provides additional context for protecting upholstery, carpets, and trim during restoration.
Maintain New Weatherstripping
Once the seals are installed, routine inspection can help extend their service life. Keep the rubber clean, remove accumulated dirt, and inspect for cracking or separation during regular detailing.
Avoid harsh solvents and products that are not intended for automotive rubber. If using a rubber-care treatment, verify that it is suitable for the seal material and follow the manufacturer’s instructions.
Also check that doors, windows, and trunk lids remain properly aligned. Excessive compression and rubbing can shorten the life of otherwise healthy seals.
Include weatherstripping inspections in your classic car preventive maintenance schedule so that small problems can be identified before water reaches valuable interior or body components.
Conclusion
Replacing classic car weatherstripping is an important restoration task that protects much more than the appearance of a vehicle. Properly fitted seals help reduce water leaks, limit wind noise, protect interior materials, and reduce the conditions that lead to hidden corrosion.
The best results begin with selecting the correct replacement parts, documenting the original installation, preparing mounting surfaces carefully, and following the appropriate fitting instructions.
Whether you are restoring a vintage muscle car, classic pickup, or collectible coupe, attention to door, window, windshield, and trunk seals can make the finished vehicle more comfortable and better protected.
With careful installation and ongoing maintenance, quality weatherstripping helps preserve the craftsmanship invested in a classic car restoration for years to come.